10:40 PM

As written in the first part of this set of articles, there are two ways
to assign Logon scripts. The first is done on the Profile tab of the
user properties dialog in the Active Directory Users and Computers
(ADUC). The second is done via Group Policy Objects (GPO). This article
will focus on the second method.
There are a few benefits for using GPOs to assign scripts:
Note: Using Windows Server 2008 GPOs to assign logon scripts is mostly the same as it was in Windows 2003, but having some people asking me questions about it in Windows Server 2008 has triggered the writing of this article.
%SystemRoot%\SYSVOL\sysvol\<domain DNS name>\Policies\{GUID}\User\Scripts\Logon
Where %SystemRoot% is usually “C:\Windows”, <domain DNS name> is the DNS name of the domain, similar to “Petri.local”, and {GUID} is a hexadecimal string representing the GUID (unique identifier) of the specific Group Policy Object in use. This folder, which is a part of the SYSVOL special folder, is replicated to all the Domain Controllers in the domain. Each GPO has its own internal User and Machine subfolders, and under them it has, if used, a Logon, Logoff, Startup and Shutdown subfolder where appropriate.
Note: The actual process of creating the script is beyond the scope of this article, there are planty of good resources with great examples on the Internet.

If you plan to have more than ONE logon script, and if you wish to assign that/those script(s) to more than one user, you will need to create as many logon scripts as you want, and then add them in the right order in the right GPO. More on that, later.
As a side note, Startup and Shutdown scripts run with the credentials of the computer object. It is recommended that the “Domain Computers” group shall be given permission to any resources used by the Startup or Shutdown scripts. However, it's worth knowing that Startup and Shutdown scripts have System privileges on the local computer. This gives Startup and Shutdown scripts access to the local file system and registry.
The title of this section is kind of misleading, because when using GPOs, you do NOT assign the GPO to a user or users, but to an Organizational Unit (OU), to an Active Directory Site, or to the entire Active Directory Domain. So, you must now decide if you want the script to apply to ALL THE DOMAIN USERS, or just to a specific set of users located within one or more OU (Organization Unit) in Active Directory Users and Computers.
If you choose to apply on all the users in the domain, you must create a Group Policy Object (or GPO) and link it to the ENTIRE domain. If you choose to apply the script ONLY to a SPECIFIC SET of users, you must place all the users in one OU (Organization Unit) in Active Directory Users and Computers, and link the GPO to that OU.
In order to assign the GPO and edit it, we'll use a tool called Group Policy Management console, or GPMC in short. This tool is not installed by default in Windows Server 2003, and neither is it installed by default in Windows Server 2008. In Windows Server 2008, GPMC is considered to be a "Feature", and you must install it before being able to use it. However, unlike in Windows Server 2003 where you must download and install the tool, in Windows Server 2008, GPMC is already a part of the OS, you simply need to add it. If the Windows Server 2008 server is also a Domain Controller, GPMC will be automatically installed as part of the DCPROMO procedure. If it's not a DC, you'll need to manually add it.
There are a few benefits for using GPOs to assign scripts:
- GPOs only work with Windows 2000 and above, meaning that if your users use older clients such as Windows 95/98 or Windows NT, GPOs won't work for them.
- When using GPOs you can assign MORE than one logon script per user, and you can configure which script runs first.
- When using GPOs you can assign more than JUST logon scripts, you can also assign LOGOFF scripts for users, and even STARTUP and SHUTDOWN scripts for the computer itself.
- GPOs can be linked to OUs, Site or Domain levels, meaning that with one GPO you can assign a logon script to many users, or even to all your users, instead of having to manually adding it to all the user objects in the domain.
Note: Using Windows Server 2008 GPOs to assign logon scripts is mostly the same as it was in Windows 2003, but having some people asking me questions about it in Windows Server 2008 has triggered the writing of this article.
Creating the logon script
The logon script is the file that does the actual action. It could be almost any action, as noted above. So we'll start by creating that script. Unlike the "old fashioned" method of using ADUC and the Profile tab of the users' account properties, the default location for GPO-initiated logon scripts is the deep within the SYSVOL special folder, which, by default, is shared on all Domain Controllers in an Active Directory forest, and is located in the following folder:%SystemRoot%\SYSVOL\sysvol\<domain DNS name>\Policies\{GUID}\User\Scripts\Logon
Where %SystemRoot% is usually “C:\Windows”, <domain DNS name> is the DNS name of the domain, similar to “Petri.local”, and {GUID} is a hexadecimal string representing the GUID (unique identifier) of the specific Group Policy Object in use. This folder, which is a part of the SYSVOL special folder, is replicated to all the Domain Controllers in the domain. Each GPO has its own internal User and Machine subfolders, and under them it has, if used, a Logon, Logoff, Startup and Shutdown subfolder where appropriate.
Note: The actual process of creating the script is beyond the scope of this article, there are planty of good resources with great examples on the Internet.
- Create the logon script and give it the appropriate name (for example: logon.bat, logon.cmd, logon.vbs, etc.) The script can use ANY name, just make sure you know what that name is, and give it the right file extension type.
- Make sure that the script runs and performs the required action when it is manually run (double-click on it).
- Copy the logon script (CTRL+C).

If you plan to have more than ONE logon script, and if you wish to assign that/those script(s) to more than one user, you will need to create as many logon scripts as you want, and then add them in the right order in the right GPO. More on that, later.
What permissions are required for Logon scripts to run?
Logon and Logoff scripts run with the credentials of the user. It is recommended that the “Domain Users” group shall be given permission to any resources used by either of these scripts. For example, if the Logon or Logoff script writes to a log file, the group “Domain Users” should be given read/write access to the file or the folder where the log file is located. Most users have limited privileges on the local computer, so Logon and Logoff scripts will have the same limited privileges.As a side note, Startup and Shutdown scripts run with the credentials of the computer object. It is recommended that the “Domain Computers” group shall be given permission to any resources used by the Startup or Shutdown scripts. However, it's worth knowing that Startup and Shutdown scripts have System privileges on the local computer. This gives Startup and Shutdown scripts access to the local file system and registry.
Assigning the script to the user or users
Next, we need to decide what user should have the logon script. With this procedure (and unlike the Active Directory Users and Computers method), you can link AS MANY logon script AS YOU WANT to your users, and you can do it as many times as you want. However, it will only work on computers that are Windows 2000 and above, although in most cases nowadays this is not a problem.The title of this section is kind of misleading, because when using GPOs, you do NOT assign the GPO to a user or users, but to an Organizational Unit (OU), to an Active Directory Site, or to the entire Active Directory Domain. So, you must now decide if you want the script to apply to ALL THE DOMAIN USERS, or just to a specific set of users located within one or more OU (Organization Unit) in Active Directory Users and Computers.
If you choose to apply on all the users in the domain, you must create a Group Policy Object (or GPO) and link it to the ENTIRE domain. If you choose to apply the script ONLY to a SPECIFIC SET of users, you must place all the users in one OU (Organization Unit) in Active Directory Users and Computers, and link the GPO to that OU.
In order to assign the GPO and edit it, we'll use a tool called Group Policy Management console, or GPMC in short. This tool is not installed by default in Windows Server 2003, and neither is it installed by default in Windows Server 2008. In Windows Server 2008, GPMC is considered to be a "Feature", and you must install it before being able to use it. However, unlike in Windows Server 2003 where you must download and install the tool, in Windows Server 2008, GPMC is already a part of the OS, you simply need to add it. If the Windows Server 2008 server is also a Domain Controller, GPMC will be automatically installed as part of the DCPROMO procedure. If it's not a DC, you'll need to manually add it.
- See if the Administrative Tools folder has a tool called Group Policy Management Console. If it does, read on.
- Open Group Policy Management Console from the Administrative Tools folder (or gpmc.msc from RUN).
- If, as described in the above paragraph, you decided to apply the script to ALL THE DOMAIN USERS, expand the domain tree, locate the domain name. Right-click the domain name and select Create and Link a GPO Here.
- If, as described in the above paragraph, you decided to apply the script to ONLY a SPECIFIC SET of users, expand the domain tree, locate the OU where the users from are located. Right-click the OU and select Create and Link a GPO Here.
- In the New GPO window, give the new GPO a descriptive name, such as "Test Logon Script GPO". Click Ok.
- If you don't see it already, refresh the GPMC view and find the new GPO you've just created under either the domain name, or the OU, depending on your previous choice.
- When you click on the new GPO you might be prompted with a message window. Click Ok.
- Right-click the new GPO and select Edit.
- In the Group Policy Object Editor window, expand User Configuration > Windows Settings > Scripts.
- Double-click Logon in the right-hand pane.
- In the Logon Properties window, click Show Files.
- A window will open. The path will be a folder similar to the following: \\domain.com\SYSVOL\Petri.local\Policies\{E4A62379-8423-4654-8DB6-01FB8F58582D}\User\Scripts\Logon. Paste the logon script you've copied in the previous part of this article. Close the window.
- Back in the Logon Properties window, click Add.
- In the Add a Script window, click Browse and you will see the logon script step #11. Whatever you do, DO NOT manually browse for the file, it should be in front of your eyes. If it's not there, check the previous steps for a mistake. Click Ok.
- Back in the Logon Properties window, see if the logon script is listed, and if it is, click Ok.
- Close the Group Policy Object Editor window.
- Close the GPMC window.


Note: Of course it might be possible that a GPO already exists and it is linked to the object level you need. In that case you don't need to create a new GPO, you can use the existing one.


Replicate the DCs
Now we need to replicate the DCs in the domain by using either Active Directory Sites and Services, Replmon, Repadmin, or wait a few moments (depending on the number of DCs). As a simple follow up to this article, I suggest you use Active Directory Sites and Services.Testing the logon script
- On one of the computers that is part of the domain, logoff the specific user account.
- Logon and test.
 Posted in: Window Server


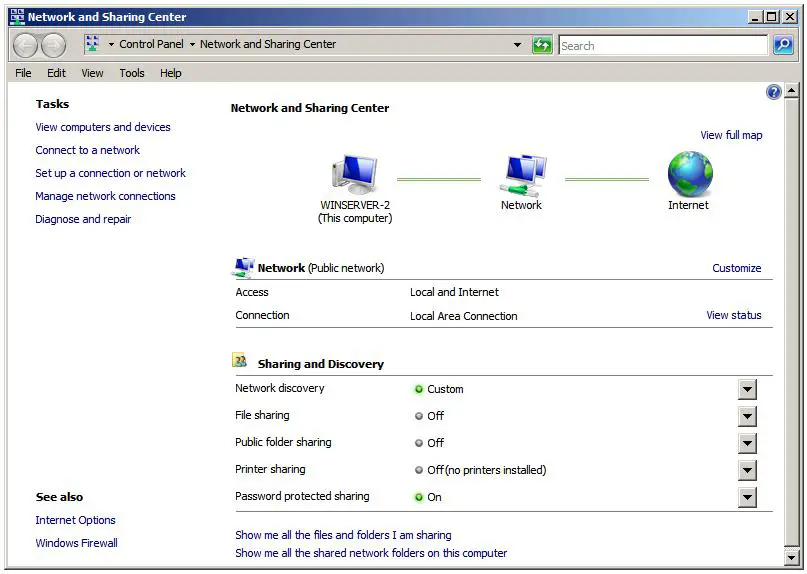 To enable public file sharing, click on the down arrow next to the Public folder sharing in the section entitled Sharing and discovery. This will provide the following list of public folder sharing options: