

 10:51 PM

Please ensure you have followed the quick installation guide and have the camera setup and accessible on your home/office network.The following instructions are going to outline how to make a SecurView camera accessible over the Internet.
We will start by assigning a unique static IP address for the camera. We will then present information regarding an option for a Dynamic DNS service.Following this we will be creating a firewall rule in the Router to allow access from the Internet to the camera.
For this example we will be using a Windows 7 computer and a TV-IP602WN with the TEW-652BRP Router.
Setting Up Static IP Address For The Camera
The camera should be configured with a static IP address. You will be required to setup a firewall rule to forward a port in your Router to the camera.If the camera’s IP address changes, the firewall rule will no longer function.
We will set the camera’s IP address to a valid IP address within the subnet defined by the Router.The Router defines the subnet based on the local network IP address and the subnet mask.You will find this information on your Router’s Network settings or Status page.Please contact your Router manufacturer for assistance if you are not familiar with accessing your Router.
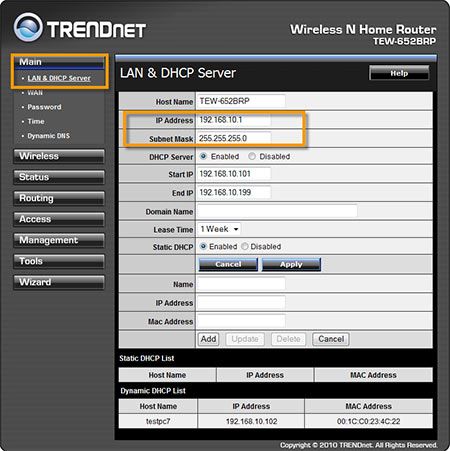
We are using the TEW-652BRP, which has the following settings.
Local Area Network (LAN) IP address: 192.168.10.1, Subnet Mask: 255.255.255.0
This allows you to use any IP address between 192.168.10.1 ~ 192.168.10.254 in the Router’s local network, except those used in the Router’s DHCP address pool (more to follow).
To access the TEW-652BRP’s configuration page, you would open a web browser (Internet Explorer) and type in the Router’s LAN IP address, http://192.168.10.1 into the address line.You will be prompted to log in to the Router.The default user name and password are both admin.After you have logged in to the TEW-652BRP, click on Main > LAN &DHCP Server.
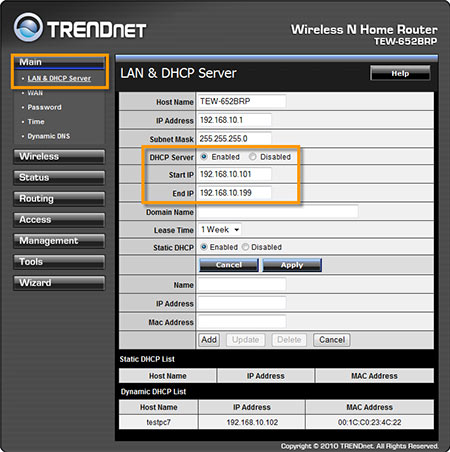
The TEW-652BRP’s DCHP server uses the following.
DHCP Start: 192.168.10.101
DCHP END: 192.168.10.199
This means the DHCP address pool is 192.168.10.101 ~ 192.168.10.199.If a network computer or a network device that is connected to the Router and setup to automatically receive an IP address, it would receive an IP address between 192.168.10.101 ~ 192.168.10.199 from the Router.
Note: each IP address can only be assigned to one network device.
The IP address you will set on the camera cannot already be in use on the network.You will want to avoid using an IP address within the DHCP pool as well (any address between 192.168.10.101 ~ 192.168.10.199).
In this example, you can use the following ranges for static IP address assignments.
192.168.10.2~ 192.168.10.100 or 192.168.10.200 ~ 192.168.10.254
We will set the camera up with the following IP address assignment.
IP Address: 192.168.10.50
Subnet Mask: 255.255.255.0
Default Gateway: 192.168.10.1
Primary DNS: 192.168.10.1
Note: The Default Gateway will be the Router’s IP address as it is the gateway to the Internet. The Primary DNS usually is also your Router’s IP address.
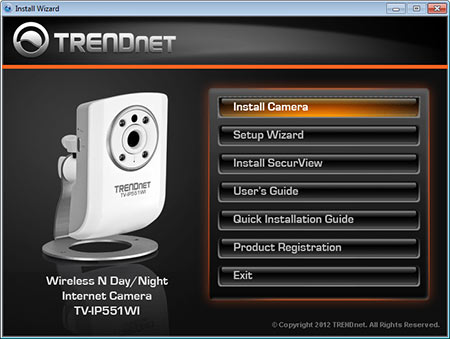
First, find the camera’s current IP address using the IPSetup Utility. From the computer, click Start then go to All Programs > TRENDnet > IPSetup > IPSetup.
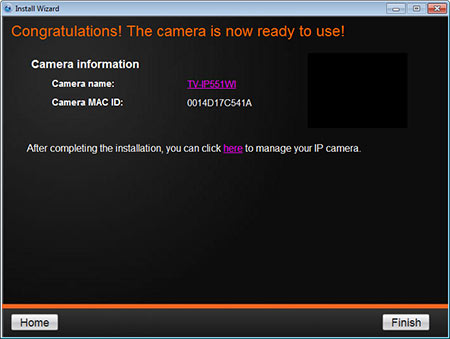
Give the IPSetup program a few seconds to find the camera and write down the camera’s IP address, which in this case is 192.168.10.30.
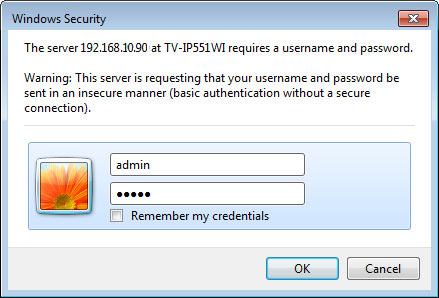
Open a Internet Explorer and go to the camera’s IP address http://192.168.10.30 , and login with the user name and password. The default username and password are both admin.If it prompts you to install ActiveX Control, click to allow running this add-on.
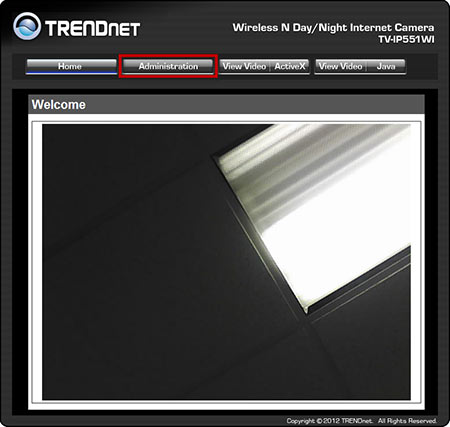
Click on Setup and then click on Network > Network.
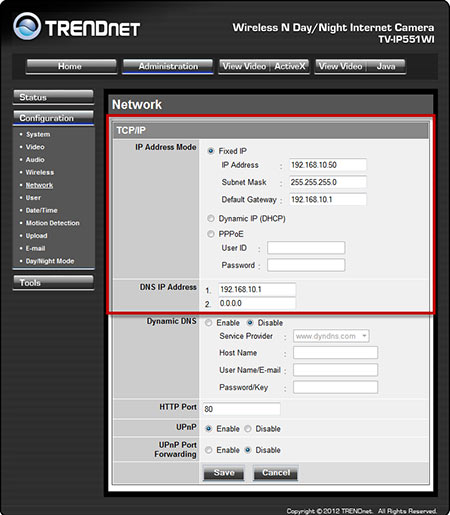
Click on the Static IP radio button and enter the addresses below which were determined earlier.
IP Address: 192.168.10.50
Subnet Mask: 255.255.255.0
Default Gateway: 192.168.10.1
Primary DNS: 192.168.10.1
Click on Apply when done and wait for the camera to save the settings. From now on, you would access the camera’s configuration by going to http://192.168.10.50 in Internet Explorer.
Note: Additional cameras would require a unique IP address.For example, on another camera you could use 192.168.10.51 as the IP address. The subnet mask, default gateway and DNS server addresses would match.
Dynamic DNS Account Setup (Optional)
Your Internet Service Provider has most likely assigned you a dynamic IP address for your Internet access. This means that periodically the Router’s WAN (Internet) IP address will change.You would need to know the Router’s WAN address to access the camera remotely over the Internet.However, if you are at a remote location when this occurs you may not be able to find out what the new WAN IP address is.This is where Dynamic DNS comes into play.
Dynamic DNS will map a host name that you create to your Router’s WAN IP address.The Router will automatically update your Dynamic DNS record when it received a new WAN IP address.In this fashion the host name will always take you to the Router’s current WAN IP address.
Check the Router’s user’s guide for information regarding built-in support for Dynamic DNS.
Note: You are not limited by your Router’s built-in Dynamic DNS support.Most Dynamic DNS providers also offer software update solutions that allow you to manage and update the Dynamic DNS records from your computer.
Create a Firewall Rule in the Router for the Camera
Your Router receives an Internet (WAN) IP address from your Internet Service Provider (ISP) and allows you to share it with network computers and devices on the Router’s local area network (LAN).
The local area network of the Router is not exposed to the Internet. The only interface accessible from the Internet is the Router’s WAN interface where the Internet IP address is assigned. When accessing the camera remotely, the request of viewing the camera goes to the Router’s WAN interface and must be directed to the camera on the Router’s local area network.
This is accomplished by creating port forwarding (virtual server) rules. In this example we will demonstrate how to forward a port in a TEW-652BRP Router to a camera’s IP address on the local area network.
Log in to the Router by opening a web browser, going to http://192.168.10.1.The default username and password are both admin.
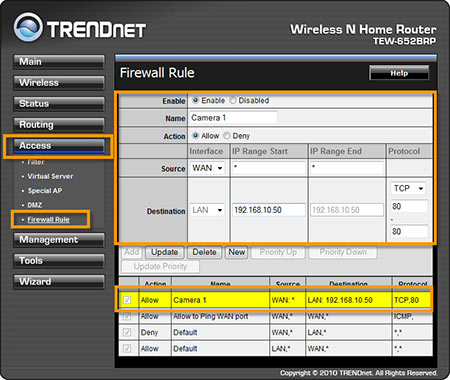
After logging in to the Router, click on the Access > Firewall Rule page.
Select Enable, give the rule a desired name and set the action to Allow.
For the Source you will select WAN and place an asterisk (*) in the IP Range Start and End fields.This will allow you to access it from anywhere on the Internet. The Destination is the camera.Previously we assigned the camera a 192.168.10.50 address.Enter this address into the IP Range Start field.
For the Protocol you will select TCP and enter in the port range from 80 to 80.The camera by default uses TCP port 80.
Note: Additional cameras require that the port they are using be forwarded to them. Each camera must be assigned a unique port as you cannot forward a port to more than one network device. To assign a camera a different port you would log in to the camera by entering its IP address into your browser.
As previously stated if we have a second camera at IP address 192.168.10.51 we can log in to it by going to http://192.168.10.51. The default username and password are both admin. Click on Setup and then click on the Network > Network. Change the HTTP port number to 81 and click Apply to save the settings.
In the Router you would create another firewall rule in the Router to forward TCP port 81 to the second camera at 192.168.10.51.
Viewing Camera from Remote Location
To access a camera from a remote location you will open Internet Explorer and enter the WAN IP address of your Router into the address bar. If you setup Dynamic DNS you can use the hostname to access the camera. Your Router will then forward the connection to the camera.
Note: Depending on the Router you have, this many not work if you are viewing the camera with a computer that is connected to the same Router as the camera. Not all Routers support loopback features. Please use a remote network to test remote viewing. You could give Router’s WAN IP address or the Dynamic DNS hostname to a friend at a different location to test this.

For additional cameras you must append the port number to the WAN IP or hostname address. In our examples we had a second camera using TCP port 81. You would access this camera by using the following examples assuming the WAN IP address of your Router is 66.85.33.405 and your hostname was trendnetddns.dyndns-at-home.com.
WAN IP Address: http://66.85.33.405:81
 Posted in: Configure Camera


